Learn
Hail Damage vs. Wear and Tear: How Adjusters Decide
The most common fight in roof claims comes down to one question: is this storm damage or just an old roof? Here's exactly what adjusters look for — and how to make sure your damage reads as damage.
Why This Distinction Decides Your Claim
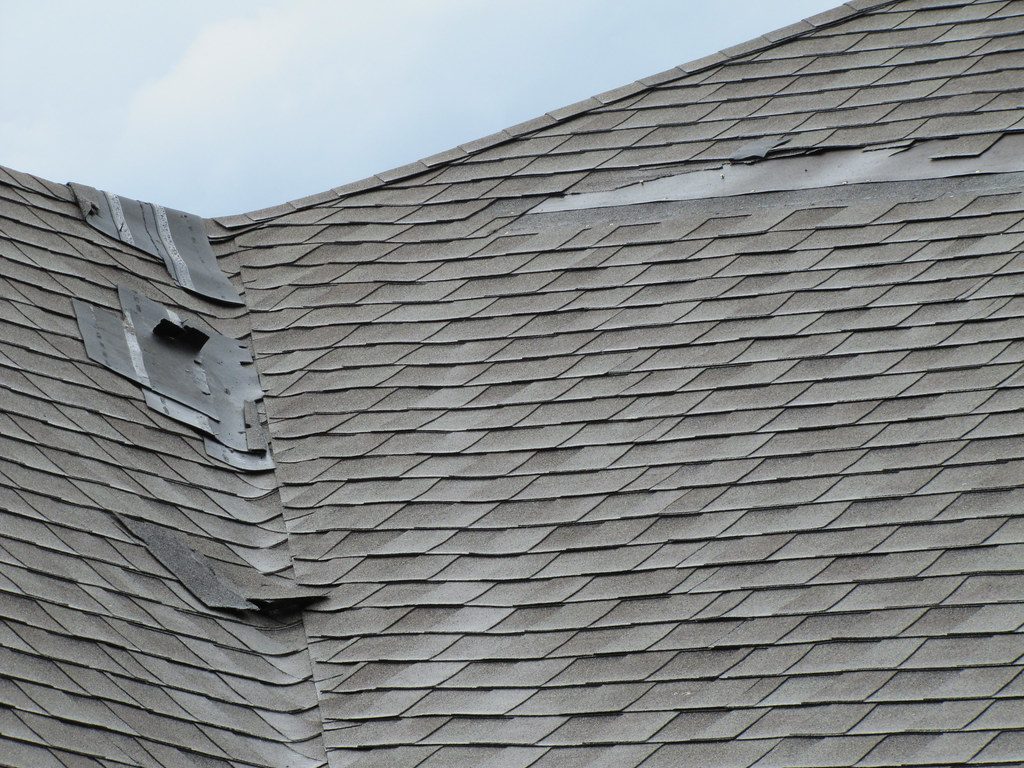
Homeowners insurance covers sudden, accidental damage — a hailstorm, wind event, fallen tree. It does not cover the gradual aging of your roof: granule loss from years of sun, curling shingles, brittle seal strips. When an adjuster classifies your roof's condition as wear and tear, the claim dies, because there's no covered "event" to pay for.
The problem is that real hail damage and real aging often exist on the same roof. A fifteen-year-old roof can absolutely take functional hail damage in a storm — age doesn't make a roof immune to hail. But it does make the adjuster's job harder, and it gives the carrier an easy narrative: "this roof was already at the end of its life." Your job is to make the storm damage legible — distinct, documented, and tied to a date.
What Adjusters Actually Look For
Adjusters are trained to distinguish impact marks from aging using a few specific tells. Knowing them helps you understand what your roof needs to show:
Pattern and distribution
Hail falls on everything — it hits all slopes facing the storm, plus collateral surfaces like gutters, downspouts, window screens, AC condenser fins, and soft metals. Wear and tear, by contrast, concentrates where the sun and weather hit hardest: south and west slopes age faster. If the "damage" is only on the sun-baked slope and the gutters are pristine, the adjuster sees aging. If every slope plus the gutters and screens show fresh impact marks, the adjuster sees a storm.
The character of the mark
A hail hit on an asphalt shingle typically shows as a dark, round bruise where granules were knocked away, often with a soft spot you can feel — the mat underneath is fractured. Adjusters press the bruise; if it gives, that's impact. General granule loss from aging is diffuse and uniform across the shingle, with no distinct impact point and no soft spot. Blistering (small raised pops in the shingle) is a manufacturing or heat issue, not hail — and adjusters know the difference.
Freshness
Fresh hail bruises look fresh: dark, sharp-edged, with granules displaced rather than worn away. Old marks weather in — edges soften, the exposed asphalt oxidizes and lightens. An adjuster who finds sharp, dark bruising across multiple slopes after a documented storm has a hard time calling it wear. This is also why timing matters: the longer you wait to file after a storm, the more your evidence weathers.
Collateral damage
This is the tiebreaker. Hail hard enough to bruise shingles dents soft metal — gutters, downspouts, flashing, vents. Dented gutters with fresh, unweathered dents next to bruised shingles tell a coherent storm story that "wear and tear" can't explain, because roofs don't dent their own gutters by aging. Always document collateral damage; adjusters weigh it heavily.
How to Document So the Evidence Speaks
You can't control what the adjuster concludes, but you control the evidence they work from. Weak documentation lets the wear-and-tear narrative win by default. Strong documentation forces a real evaluation:
- Photograph every slope, not just the worst one. Hail hits all exposures. Full-slope coverage proves pattern; a handful of close-ups proves nothing.
- Include scale in close-ups. A ruler or coin next to bruising shows size and seriousness. Unscaled photos get dismissed as minor.
- Shoot the collateral damage. Dented gutters, downspouts, screens, AC fins — date-stamped and close. This is often what tips the decision.
- Chalk-mark a test square. Contractors often mark a 10x10-foot test square and count bruises inside it. It turns "some damage" into a quantified finding.
- Tie everything to the storm date. National Weather Service reports, local news, hail maps for your ZIP code. If you haven't filed yet, read whether insurance covers hail damage to make sure your facts line up before you call.
Our storm damage photo guide walks through the complete method — what to shoot, in what order, and the mistakes that make good damage look inconclusive.
If the Adjuster Still Calls It Wear and Tear
A wear-and-tear finding isn't the end. It's a position, and positions can be challenged with better evidence:
Get a contractor's written assessment. Have a reputable roofer inspect and document their findings in writing — number of bruises per test square, collateral damage observed, and their professional opinion on causation. A second professional opinion on the record carries weight, especially from a contractor with insurance-claim experience.
Request reinspection with specifics. Don't just say "I disagree." Point to what the first inspection missed: "the April inspection noted the south slope but did not document the fresh gutter denting on the north elevation or the bruising on the west slope shown in the attached dated photos." Specific challenges get specific responses.
Know the full denial playbook. Wear-and-tear findings lead many of the most common denials. Our guide to why roof claims get denied covers each reason and the appropriate response — because the right counter to a wear-and-tear finding is different from the right counter to a cosmetic-damage finding, and using the wrong one wastes your shot.
One honest caveat: sometimes the adjuster is right. A twenty-five-year-old three-tab roof with uniform granule loss, curling, and no distinct impact marks after a minor storm may genuinely be at end of life with no covered damage. No documentation strategy changes that. But when there is real storm damage on an aging roof, the difference between a paid claim and a wear-and-tear denial usually comes down to who documented better.
Make your damage undeniable
The Storm Damage Photo Guide ($17) shows you exactly what to photograph, how to photograph it, and what adjusters look for — slope-by-slope checklists, close-up technique, and collateral damage documentation that turns "wear and tear" findings around.