Learn
What to Do in the First 48 Hours After Roof Storm Damage
The two days after a storm matter more than most homeowners realize. Here's exactly what to do — in order — to keep your home safe, your family out of danger, and your future insurance claim on solid ground.
First: Make Sure It's Safe to Be in the House
Before you think about insurance, think about safety. After a severe storm, walk through your home and look for hazards before you settle back in. Water coming through the ceiling, sagging drywall, the smell of gas, sparking outlets, or downed power lines outside are all signs you need to slow down and call the right help first.
If you see standing water inside, keep clear of any area with electrical fixtures — a flooded light fixture or a wet outlet is not a DIY problem. If a tree or large branch has come down on the roof, stay out from under that section of the house until someone qualified has looked at it. Structurally compromised framing doesn't always announce itself, and ceilings can fail hours after the rain stops.
This is the one part of the process where speed beats thoroughness. Deal with genuine danger first; documentation can come once everyone is safe.
Document the Damage Before You Touch Anything
Once it's safe, grab your phone and start photographing — before you pick anything up, move anything, or start cleaning. The condition of your property in the immediate aftermath of the storm is the strongest evidence you'll ever have, and you only get one chance at it.
Take wide shots first: the full roof slope from the ground, each side of the house, the yard with any fallen branches or debris. Then move closer: lifted or missing shingles, bent gutters, dented vents, damaged window screens and siding, downed fencing. If it's safe to photograph the attic, get shots of any wet insulation, dripping decking, or daylight coming through.
Make sure your phone's date and time stamps are on — most phones embed this automatically. If you can, note the approximate time of the storm; you'll need that date of loss when you file the claim, and it should match the actual weather event. We've written a full guide to photographing roof damage for a claim if you want to go deeper here, because adjusters notice the difference between thorough documentation and three blurry photos.
Stop Further Damage: Your Duty to Mitigate
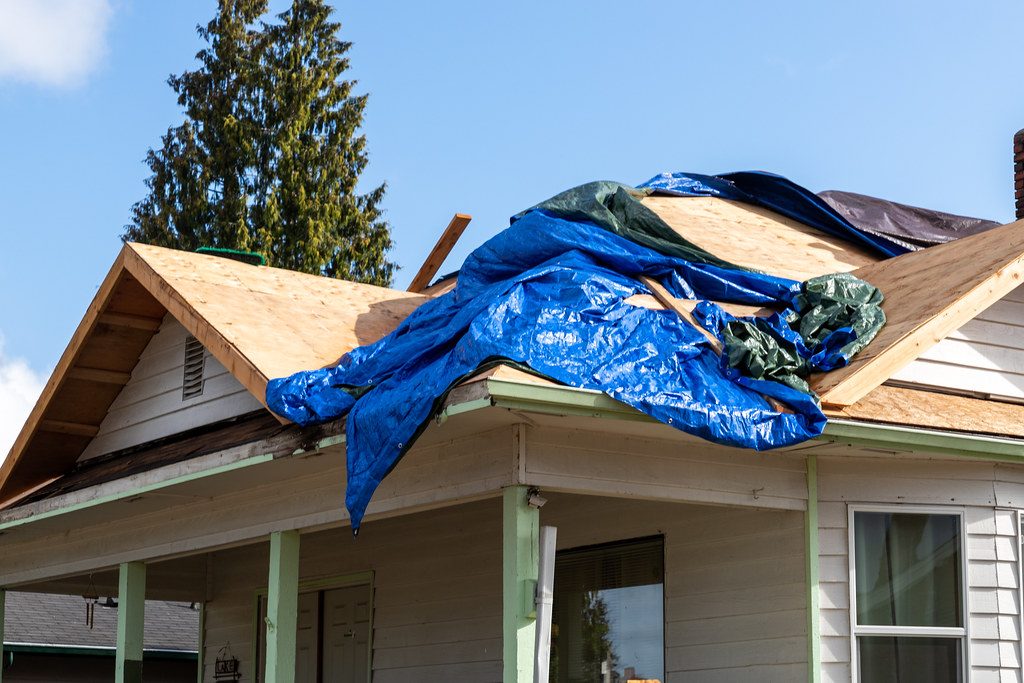
Almost every homeowners policy includes a duty to mitigate — you're expected to take reasonable steps to prevent further damage after the storm. This doesn't mean fixing the roof yourself. It means things like laying a tarp over an exposed section of roof, placing buckets under an active drip, or moving valuables out of the path of water.
The classic move is emergency tarping. A heavy-duty tarp draped over the damaged area and secured around the edges keeps the next rain out. If you're not comfortable on a ladder, a roofer or handyman can usually get a tarp up quickly, and the cost of reasonable emergency mitigation is often something you can include in the claim.
Keep every receipt for these emergency steps — tarp purchases, tarping labor, wet-vac rentals. Photograph what you did, too: the tarp installed, the area protected. If the carrier later questions whether you protected the property, you want a paper trail showing that you did.
What you should not do is begin permanent repairs before the adjuster has seen the damage. Patching the roof permanently, replacing shingles, or tearing anything off destroys the evidence the adjuster needs to evaluate. Temporary protection: yes. Permanent repair: wait.
Check for Interior Damage While You Wait
Roof damage and interior damage usually arrive together, and interior damage is easy to miss in the first day. Walk the attic if you can get up there safely and look for wet spots on the underside of the decking. Inside, check ceilings and walls — especially under roof valleys and around chimney flashing — for stains, bubbling paint, or soft drywall.
Mark anything you find with a small piece of painter's tape and photograph it with the tape in frame. When the adjuster comes, point these spots out explicitly. Interior water damage is part of the claim, and adjusters evaluate what they can see — if you never look in the attic, they may never look either.
Get the Storm on Record
Within those first two days, pull together a record of the storm itself. News articles, local weather service reports, and hail reports for your ZIP code all help tie your damage to a specific date of loss. A carrier may ask how you know the damage came from the recent storm rather than years of wear, and being able to say "the National Weather Service reported golf-ball hail in this county on Tuesday" answers that question cleanly.
You don't need to become a meteorologist. A couple of saved screenshots — a local news story, a weather alert archive, a dated hail report — is usually plenty. Just make sure the date of loss you report matches the storm you document.
File the Claim — and Know What Happens Next
You can file the claim with your carrier's claims line as soon as you're ready — many homeowners file on day one or two. When you call, you'll give the basics: policy number, property address, the date of loss, and a short description of the damage. You'll get a claim number and, typically, a call from the assigned adjuster within a few business days.
Keep a claim journal from this moment forward. Write down the date and time of every call, who you spoke with, and what they said. Save every letter, email, and text from the carrier in one folder — physical or digital. Claims have long memories, and the homeowner who can quote back exactly what was said in March usually gets better answers in May.
Don't be surprised if the first adjuster visit takes a week or two to schedule, especially after a widespread storm when adjusters are booked solid. That's normal. Your job in the meantime is simple: stay tarped, stay documented, and don't let anyone rush you into signing anything — particularly not a roofing contract you haven't read — just because the storm brought door-knockers to the neighborhood.
A Note on the Contractors Who Show Up
After a big storm, contractors will find you — door knocks, yard signs, flyers. Some are excellent local roofers; some followed the storm from three states away and will be gone before the warranty matters. In the first 48 hours, you don't need to sign anything with anyone. Take cards, check licenses and local references at your own pace, and remember that you choose your contractor — not the carrier, and not the person who knocked first.
The same goes for anyone asking you to sign over your claim rights or sign a document you don't fully understand. There's no legitimate reason anything needs your signature in the first two days. Protect the home, document the damage, file the claim, and take your time with everything else.
Your 48-Hour Checklist
- Check for safety hazards — water near electrical, sagging ceilings, structural damage
- Photograph all damage before cleaning or moving anything
- Tarp exposed areas to prevent further damage; keep receipts
- Inspect the attic and interior ceilings for water intrusion; mark and photograph
- Save evidence of the storm itself — news, weather reports, dated hail reports
- File the claim and record the claim number
- Start a claim journal and a file for every carrier communication
- Don't sign roofing contracts or permanent-repair work until the adjuster has inspected
Want the full walkthrough?
The Roof Claim Playbook is a 25-page plain-English guide for homeowners that walks through your entire claim — from the first storm to the final check — so the days after the damage never feel like guesswork.